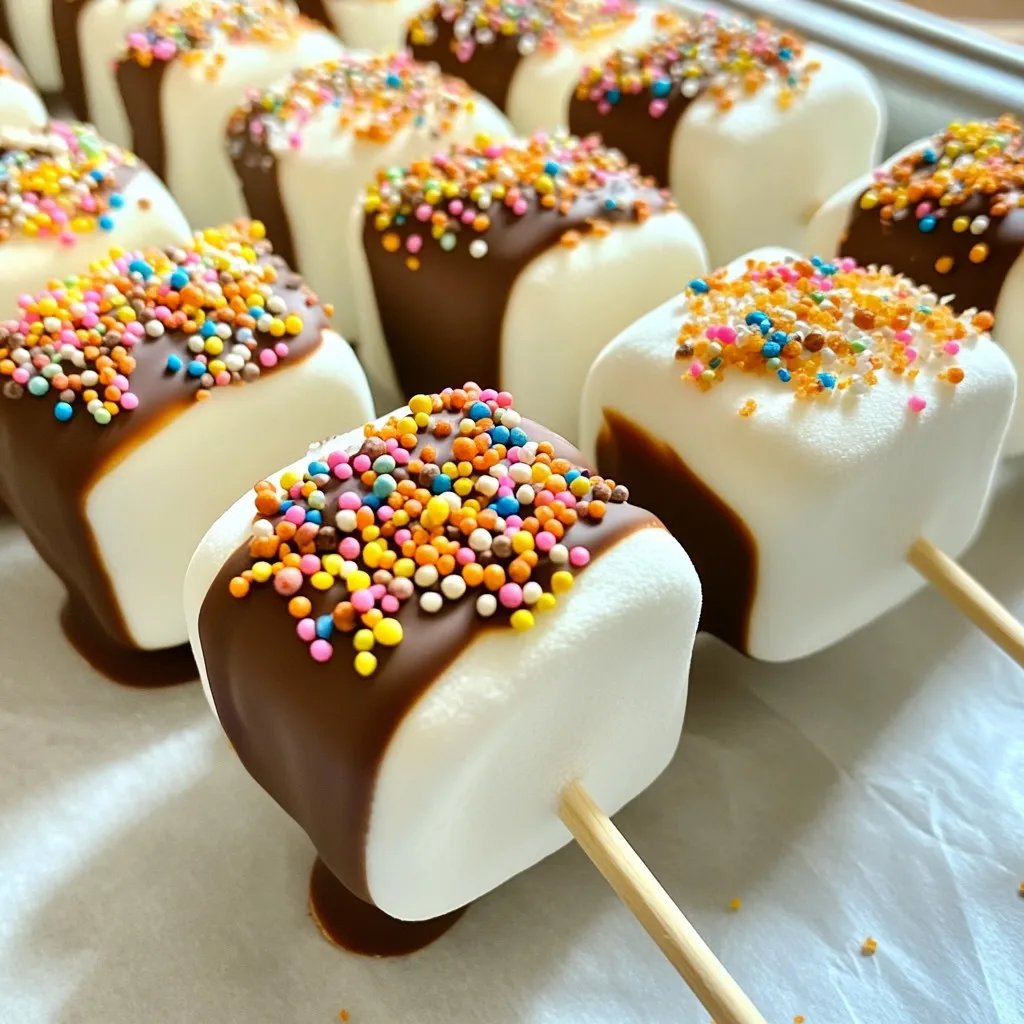
If you’re looking to bring some fun and sweetness to your day, try making Chocolate Dipped Marshmallow Pops! These delightful treats are easy to make and perfect for any occasion. Whether you’re throwing a party or just want a tasty snack, I’ll guide you through step-by-step instructions. Grab your ingredients and get ready to create a treat that will impress everyone. Let’s dive in and make some sweet magic together!
Why I Love This Recipe
- Fun to Make: These marshmallow pops are a delightful activity to do with kids or friends, making them perfect for parties or family gatherings.
- Customizable: You can get creative with toppings—choose from colorful sprinkles, crushed nuts, or even graham crackers for a s’mores twist!
- Great for Any Occasion: Whether it’s a birthday, holiday, or just a sweet treat, these pops are sure to impress and bring smiles.
- Deliciously Decadent: The combination of fluffy marshmallow and rich chocolate creates a mouthwatering treat that’s hard to resist.
Ingredients
List of Ingredients
– Large Marshmallows
– Semi-Sweet Chocolate Chips
– Coconut Oil
– Colorful Sprinkles or Crushed Nuts
– Lollipop Sticks or Wooden Skewers
– Optional Ingredients for Variations
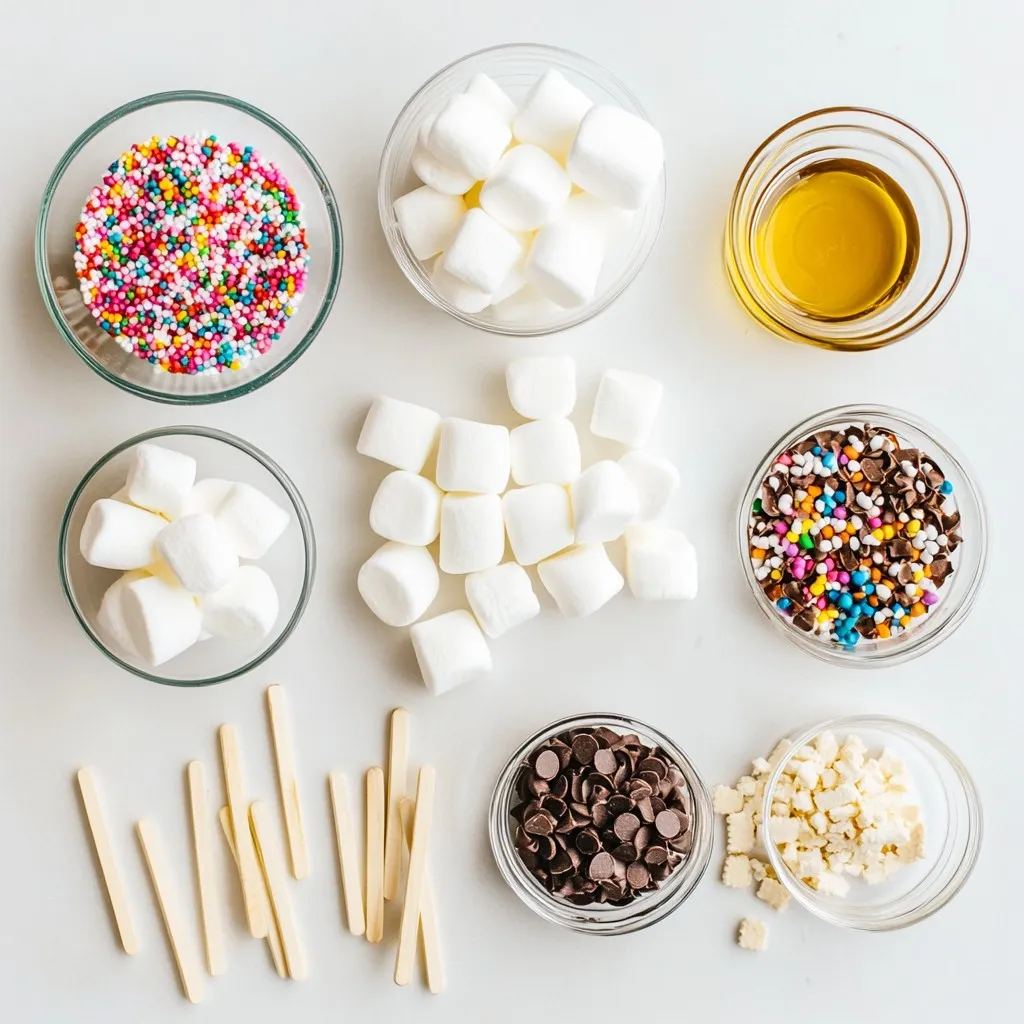
To make Chocolate Dipped Marshmallow Pops, gather these simple ingredients. You will need ten large marshmallows. These fluffy treats form the base of your pops. Next, get one cup of semi-sweet chocolate chips. This chocolate adds a rich flavor that pairs well with the marshmallows.
You will also need one tablespoon of coconut oil. The oil helps the chocolate melt smoothly and adds a nice shine. For decoration, prepare half a cup of colorful sprinkles or crushed nuts. These toppings make your pops look fun and inviting.
Don’t forget about the lollipop sticks or wooden skewers. They are essential for holding your pops. If you want to get creative, you can use optional ingredients. For a s’mores twist, try adding a quarter cup of crushed graham crackers. This step adds a delicious crunch and flavor.
With these ingredients ready, you can start making your delightful treats!
Step-by-Step Instructions
Preparing the Marshmallows
To start, grab your marshmallows. Insert a lollipop stick into each one, pushing it halfway through. This keeps them stable for dipping. Next, arrange the marshmallows on a baking sheet lined with parchment paper. This helps with cleanup later.
Melting the Chocolate
Now, let’s melt the chocolate. In a microwave-safe bowl, combine the chocolate chips and coconut oil. The coconut oil makes the chocolate smooth. Microwave the bowl in 30-second bursts. After each burst, stir the chocolate. Keep doing this until it is fully melted and smooth.
Dipping and Decorating
Grab a marshmallow pop by the stick. Dip it into the melted chocolate. Swirl it around to coat it evenly. Let any extra chocolate drip off. Now, it’s time to add toppings! Sprinkle colorful sprinkles or crushed graham crackers on the chocolate. Do this while the chocolate is still wet. Then, place the dipped marshmallow back on the baking sheet.
Setting the Chocolate Pops
Once all the marshmallows are dipped, it’s time to set them. Place the baking sheet in the refrigerator. Let the pops chill for about 30 minutes. This helps the chocolate harden properly.
Serving Suggestions
When the chocolate is firm, it’s time to serve! Arrange your Chocolate Dipped Marshmallow Pops on a decorative platter. For a fun twist, you can also mix and match toppings. These treats are perfect for parties or family gatherings!
Tips & Tricks
Best Practices for Melting Chocolate
Using Coconut Oil
Coconut oil helps chocolate melt smoothly. It also adds a nice shine. Mix one tablespoon of coconut oil with your chocolate chips. This makes it easier to dip your marshmallows.
Avoiding Seizing
Seizing happens when water gets into chocolate. Even a tiny bit can ruin your chocolate. To avoid this, ensure all your tools are dry. Only use a microwave-safe bowl for melting.
Perfecting the Dipping Technique
Even Coating
To coat your marshmallow pop evenly, dip it straight into the chocolate. Swirl it gently. Move it up and down to cover all sides. This helps create a nice, thick layer of chocolate.
Draining Excess Chocolate
After dipping, lift the marshmallow out slowly. Hold it over the bowl for a few seconds. This lets extra chocolate drip off. You want a smooth finish, not a puddle.
Storing and Serving Freshness
Best Ways to Store
Store your chocolate dipped marshmallow pops in a cool place. Keep them in an airtight container. This helps prevent them from getting sticky. If it’s warm, refrigerate them for longer freshness.
How to Keep Pops Fresh
To keep your pops fresh, avoid stacking them. Place parchment paper between layers if you need to stack. This keeps the chocolate from sticking. Enjoy your treats within a week for the best taste!
Pro Tips
- Use Quality Chocolate: For the best flavor and texture, opt for high-quality chocolate chips. They melt smoothly and provide a rich taste.
- Customize Your Toppings: Get creative with toppings! Try using crushed cookies, nuts, or even drizzle with white chocolate for added flair.
- Chill Before Serving: Allow the chocolate to fully set in the refrigerator. This ensures that the pops hold their shape and are easier to handle.
- Perfect Dipping Technique: For an even coat, dip the marshmallow straight down and pull it up at an angle, allowing excess chocolate to drip off before adding toppings.
Variations
Different Toppings Ideas
You can have fun with toppings! Sprinkles add color and crunch. You can use colorful sprinkles or go for crushed nuts. Both options make your pops look great. For a flavor twist, try adding peppermint or caramel toppings. These flavors mix well with chocolate. Think about how you want each pop to taste!
S’mores Twist
Want to make a s’mores treat? Use crushed graham crackers on top. This twist adds a fun texture. After dipping the marshmallow in chocolate, sprinkle the graham crackers right away. It gives you that campfire feel! The combination of chocolate and marshmallows makes it a classic favorite. This twist is sure to please everyone!
Seasonal Themes
You can customize these pops for any season! For Christmas, use red and green sprinkles. For Halloween, try orange and black colors. You can even shape marshmallows like ghosts or pumpkins. This makes them perfect for parties or events. Make each pop special for your theme. Your guests will love these creative treats!
Storage Info
Best Methods for Storing
To keep your chocolate dipped marshmallow pops fresh, you have two main options: room temperature or refrigeration.
– Room Temperature: If you plan to eat them within a day, you can store them at room temperature. Place them in an airtight container to avoid air exposure. Keep them in a cool, dry spot away from direct sunlight.
– Refrigeration: For longer storage, refrigerate the pops. Place them in an airtight container. This method helps maintain freshness and keeps the chocolate firm. However, be careful when removing them, as condensation can form on the chocolate.
Freezing Chocolate Dipped Marshmallow Pops
You can also freeze these treats for later enjoyment. Freezing is a great option if you want to make them ahead of time.
– How to Freeze Effectively: First, let the pops cool completely after chocolate sets. Then, arrange them in a single layer on a baking sheet. Freeze them for about an hour. Once firm, transfer them to a freezer-safe container or bag. This prevents them from sticking together.
– Thawing before Serving: When you are ready to serve, take them out of the freezer. Place them in the fridge for a few hours to thaw. Avoid thawing at room temperature, as this can make the chocolate too soft. Enjoy your pops after they’ve warmed up slightly in the fridge!
FAQs
Can I use milk chocolate instead of semi-sweet?
Yes, you can use milk chocolate. It will taste sweeter and creamier. The melting process is similar. You just need to melt it slowly to avoid burning. Use a microwave in short bursts, stirring often.
How long can I store chocolate dipped marshmallow pops?
You can store them for about one week. Keep them in an airtight container at room temperature. If they look dry or have a strange smell, throw them away.
Can I make these pops in advance?
Yes, you can prepare these pops one day ahead. Just dip and decorate them. Store them in the fridge to keep the chocolate firm and fresh.
What can I use instead of lollipop sticks?
You can use wooden skewers or even pretzel sticks. Wooden skewers are longer and sturdy. Pretzel sticks add a nice crunch. However, they may break easier than lollipop sticks.
You’ve learned how to make delicious chocolate-dipped marshmallow pops. This treat is fun, easy, and allows for many creative twists. From choosing toppings to storing pops, each step adds joy to your creation. Try different flavors and themes to match any occasion.
Enjoy making your pops with friends and family. Share your unique designs and flavors. The fun is in the making, so dive in and start toda