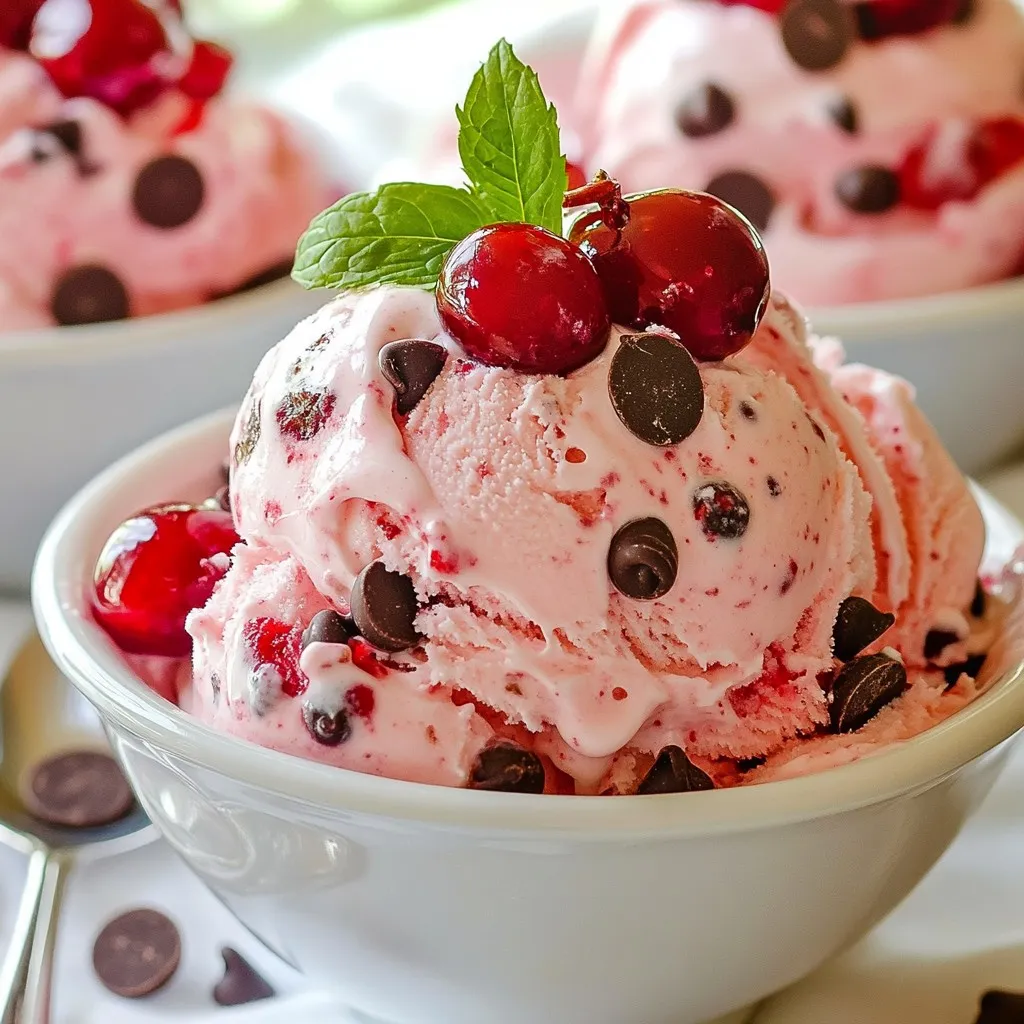
Get ready to indulge in a rich and creamy Cherry Chocolate Chip Ice Cream that you can make at home! With fresh cherries, smooth chocolate chips, and a hint of vanilla, this delightful treat is perfect for any occasion. I’ll guide you through each simple step, from choosing your ingredients to serving suggestions. Whether you’re an ice cream expert or a beginner, this recipe is sure to impress. Let’s get started!
Why I Love This Recipe
- Fresh and Flavorful: This recipe uses fresh cherries, providing a burst of natural flavor that elevates the dessert.
- Perfectly Creamy: The combination of heavy cream and whole milk creates a rich and creamy texture that melts in your mouth.
- Chocolate Delight: Adding chocolate chips enhances the indulgence, making every bite a delightful experience.
- Easy to Make: With simple ingredients and straightforward steps, this recipe is perfect for both beginners and experienced cooks.
Ingredients
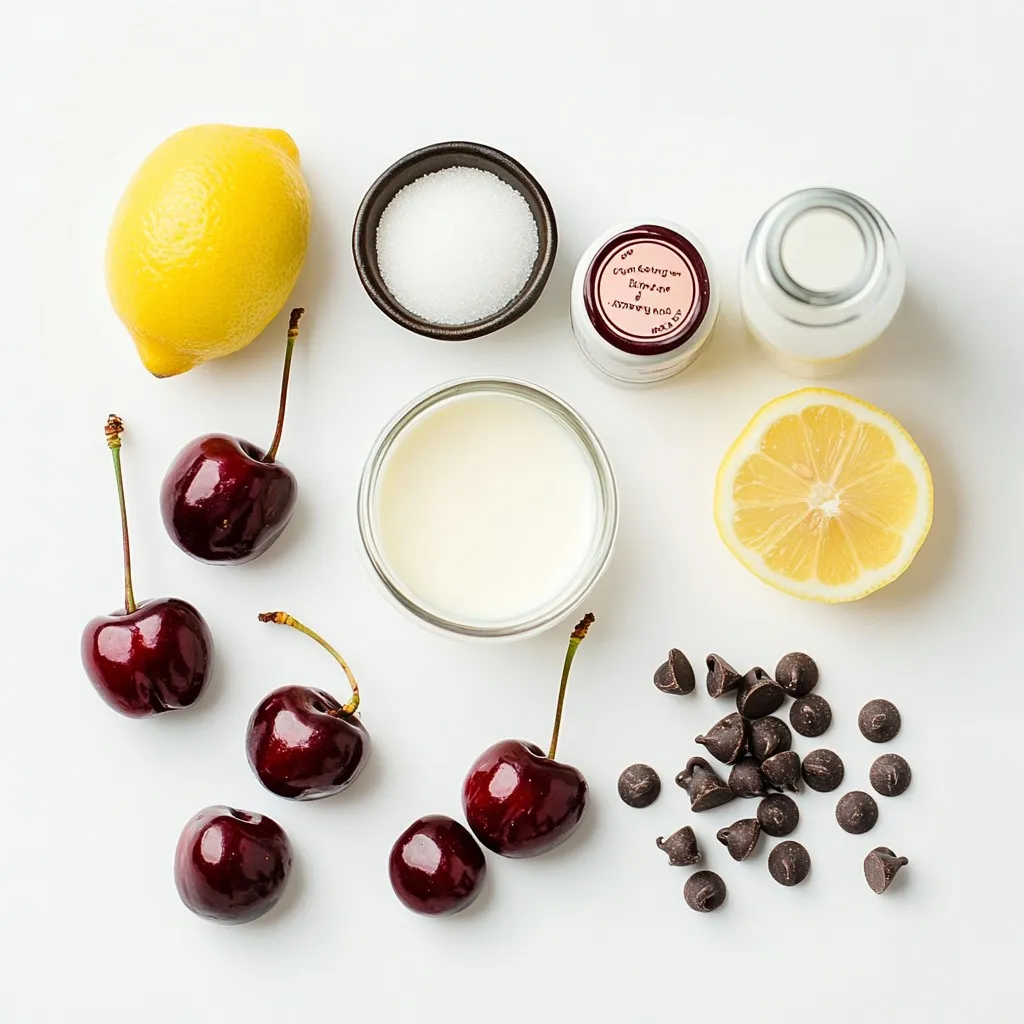
List of Main Ingredients
– Fresh cherries
– Granulated sugar
– Vanilla extract
– Heavy cream
– Whole milk
– Chocolate chips
– Lemon juice
To make this tasty cherry chocolate chip ice cream, you need fresh cherries. I love using ripe, sweet cherries for the best flavor. You will also need granulated sugar to sweeten the mix. Next, grab some vanilla extract. It adds a lovely touch to the ice cream.
Heavy cream is key for a rich, creamy texture. Whole milk helps balance everything out and keeps it smooth. For the chocolate lovers, chocolate chips are a must. You can use semi-sweet or dark chocolate chips, based on your taste. Finally, a splash of lemon juice brightens the cherry flavor.
Measurements and Substitutions
– Alternatives for heavy cream
– Sugar substitutes for a healthier option
– Different types of chocolate chips
If you want a lighter version, you can swap heavy cream for coconut cream or Greek yogurt. Both options keep the creaminess while reducing fat. For a healthier option, consider using honey or maple syrup instead of granulated sugar. This change can add a nice flavor twist too.
When it comes to chocolate chips, feel free to experiment. Use milk chocolate for a sweeter taste or dark chocolate for a rich flavor. You could even try white chocolate for a fun twist!
Step-by-Step Instructions
Preparing the Cherry Mixture
1. Cook the Cherries: Start by placing 2 cups of fresh, pitted, and halved cherries in a medium saucepan. Add 1/2 cup of granulated sugar.
2. Heat and Stir: Cook this mixture over medium heat. Stir occasionally for about 5-7 minutes. You want the cherries to soften and release their juices.
3. Add Flavor: Remove the pan from heat. Stir in 1 tablespoon of lemon juice and 1 teaspoon of vanilla extract. These add great flavor!
4. Cool Down: Let the cherry mixture cool to room temperature. This is important before mixing with the cream.
Combining Ice Cream Base
1. Mix the Cream: In a large mixing bowl, whisk together 2 cups of heavy cream, 1 cup of whole milk, and the remaining 1/2 cup of sugar. Ensure the sugar dissolves completely.
2. Fold in the Cherries: Once the cherry mixture is cool, gently fold it into the cream mixture. Mix thoroughly but be careful not to over-stir.
Churning and Freezing
1. Use an Ice Cream Maker: Pour the combined mixture into your ice cream maker. Churn according to the manufacturer’s instructions. This usually takes about 20-25 minutes.
2. Add Chocolate Chips: In the last few minutes of churning, slowly add 1 cup of chocolate chips. They will mix in nicely.
3. Transfer to Container: After churning, transfer the ice cream to an airtight container. Freeze for at least 4 hours, or until it is firm.
These steps will lead you to a delicious cherry chocolate chip ice cream that is hard to resist!
Tips & Tricks
Perfecting Your Ice Cream Texture
To get the best texture, follow these tips:
– Churning time: Aim to churn for 20-25 minutes. This time gives the ice cream a nice, soft texture.
– Avoiding ice crystals: Use cold ingredients and chill your mixture before churning. This helps stop ice from forming.
Serving Suggestions
Serving your cherry chocolate chip ice cream can be fun! Here are some ideas:
– Presentation ideas: Use chilled bowls for a nice touch. Top with extra chocolate chips or a sprig of mint.
– Pairing with toppings: Try drizzling chocolate sauce or adding chopped nuts for crunch.
Common Mistakes to Avoid
Watch out for these common errors:
– Over-churning tips: Don’t churn too long; this can make the ice cream hard. Stop once it reaches a soft-serve consistency.
– Ingredient measurement errors: Measure carefully. Too much sugar or cream can change the taste and texture.
Pro Tips
- Use Fresh Cherries: For the best flavor and texture, choose ripe, fresh cherries when making this ice cream.
- Chill Your Ingredients: Ensure that your cream and milk are well chilled before mixing to help the ice cream churn more effectively.
- Fold Gently: When incorporating the cherry mixture into the cream, fold gently to maintain the airiness of the mixture.
- Adjust Sweetness: Taste the cherry mixture before adding it to the cream; you can add more sugar if you prefer a sweeter ice cream.
Variations
Flavor Variations
You can change the flavor of your cherry chocolate chip ice cream. Try adding different fruits like raspberries or strawberries. These berries mix well with cherries and add a new twist. You can also use white chocolate chips instead of regular chocolate chips. This will give your ice cream a sweeter taste.
Dietary Adjustments
If you want a vegan version, swap heavy cream and milk for coconut cream and almond milk. Use agave syrup instead of sugar for a sweeter flavor. For those who are lactose-free, almond milk or oat milk works great. You can still enjoy the cherry flavor without dairy.
Seasonal Twists
You can make your ice cream fit the seasons. In summer, add fresh peaches or blueberries. These fruits add a bright taste to your ice cream. For winter, try adding spices like cinnamon or nutmeg. These spices can warm up the flavors and make it cozy.
Storage Info
Best Practices for Freezing
– Use an airtight container to keep ice cream fresh.
– Choose a container that fits the amount well.
– Leave some space at the top to allow for expansion.
– Avoid freezer burn by sealing the container tightly.
Shelf Life
– You can store the ice cream for about 2-3 weeks.
– After that, it may lose flavor and texture.
– Signs of spoilage include ice crystals on the surface.
– If it smells off or tastes bad, toss it out.
Re-churning Instructions
– To restore the texture, let the ice cream sit out for a bit.
– Once it softens, churn it again briefly in the ice cream maker.
– This helps break up ice crystals and smooths it out.
– Serve it right after re-churning for the best taste.
FAQs
How do you make cherry chocolate chip ice cream from scratch?
To make cherry chocolate chip ice cream, start with fresh cherries. Cook them with sugar to release their juice. Add lemon juice and vanilla for flavor. Mix heavy cream, whole milk, and more sugar in a bowl. Combine the cherry mix with the cream mix. Pour into an ice cream maker and churn until soft. Add chocolate chips in the last few minutes. Freeze the ice cream for a few hours until firm. It’s a simple process that brings joy!
What are the best cherries to use for ice cream?
The best cherries for ice cream are sweet varieties. Bing cherries are popular for their rich flavor. Rainier cherries are also great; they add sweetness and color. Both types create a lovely base for the ice cream. Using fresh, ripe cherries makes a big difference in taste. Aim for cherries that are firm and juicy when selecting.
Can I make this ice cream without an ice cream maker?
Yes, you can make cherry chocolate chip ice cream without an ice cream maker. Use a large bowl to mix your ingredients. Pour the mix into a shallow dish. Place it in the freezer. Every 30 minutes, stir it with a fork for a creamy texture. This method may take longer, but it still works well. Enjoy your homemade ice cream in a fun way!
Making cherry chocolate chip ice cream is easy and fun. You learned about choosing fresh cherries, using sugar, and mixing creamy ingredients. I shared tips for perfect texture and serving ideas. You also discovered variations like vegan options and seasonal twists. Follow these steps and tips to create a tasty treat. Enjoy every bite, and share it with family and friends! Your homemade ice cream will impress everyone. Remember, practice makes perfect, so keep trying different flavor